
SENSE-ABLE Computing
═══ TEAM MEMBERS ═══
Team 1 (2019-2020): Led by Christian Leycam. Other team members are Olivia, Mimi, Kristie, Irlanda Gonzalez, Kitty Gu, Karen Nakamura (Student) and Ewan Seo.
Team 2 (2021-Current): Led by Anthony Zhou. Other team members are Sohom, Taliyah, Amaan, and Abigail.
═══ PROBLEM ═══
Traditional STEM and Design Tools are simply inaccessible as most assume or even require the ability to use the screen, keyboard and mouse. As a result, many people with disabilities are dissuaded from going into the STEM fields and potentially making valuable contributions. When such a huge field is cut off, disabled people are essentially disempowered from feeling that they too can change the world.
═══ OBJECTIVE ═══
Create a multisensory, tactile, screenless, Turing-complete programming environment. The target audience would be learners who want to change the world but find keyboard/mouse/screen programming environments inaccessible.
OVERVIEW: SENSE-ABLE COMPUTING PROGRAM OBJECTIVES
Create an early learning programming environment that:
● does not need a screen, keyboard, mouse
● is multisensory (tactile, haptic, auditory, visual)
● has a low learning curve and easily perceptible
● is low cost — both for the initial starter kit and for more complex programs
● is open source/open hardware
● is Turing-complete — i.e., it’s a full programming language and not just a truncated command set
The objective is to build a coding environment that expands beyond the traditional limitations posed by just a monitor and keyboard. The team aims to do this through the construction of physical code through an interactive puzzle set that assigns each piece a variable or command that you would see within a line of code in a program. The puzzle pieces themselves would make use of unique tactile surfaces and physical identifiers that would allow young learners to distinguish the different commands among their fingertips. The “physical” code can then be interpreted with a camera underneath that would scan the configuration of the puzzle, and then register the code with audio feedback that would inform the user what they have just programmed.
In order to best execute the plan, the members divided into two teams: Sense-Able Input P3 and Sense-Able Output Apple Pi. Team Input was in charge of designing the tactile interface for the user to add code, and Team Output was in charge of designing the robot that would read the inputted code and act as directed.
Inspiration and challenges
A major inspiration was the Blind Arduino Project led by Dr. Josh Miele (Amazon) and the Blind Arduino Tutorials created by URAPer Sabrina Min Lee.
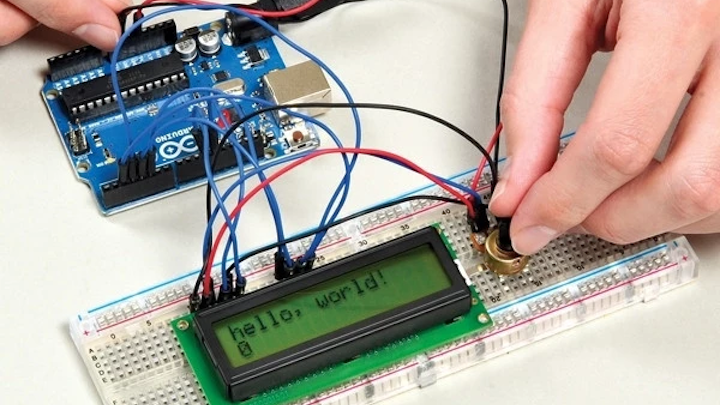
There were however some challenges with Arduino. The Arduino Uno (physical device) is inaccessible to the blind, low vision user and anyone who does not have fine motor control. The Arduino IDE (programming environment) requires a full a full operating system installation and is not screen reader friendly. It’s a full programming language and compiler which means it has a steep learning curve.
If the lab wanted to introduce STEM skills to K-12 learners, we needed an alternative to Arduino and its IDE.
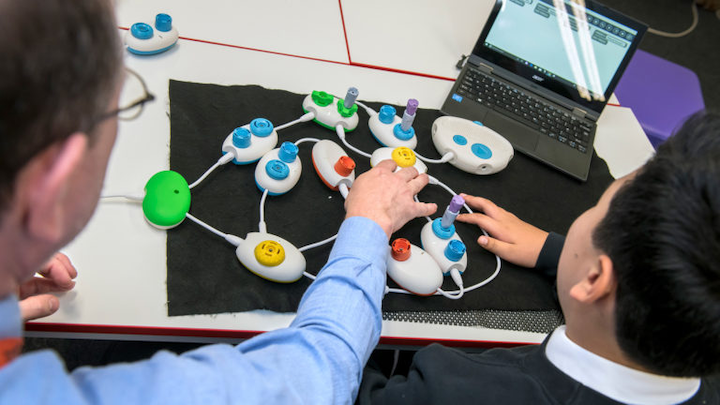
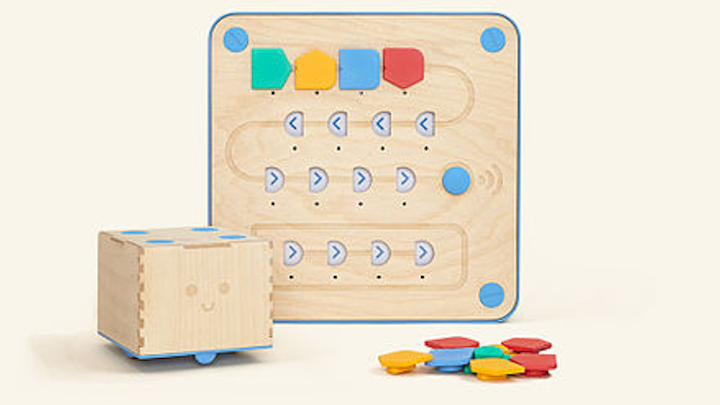
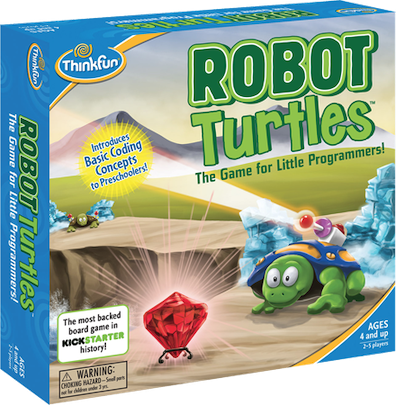
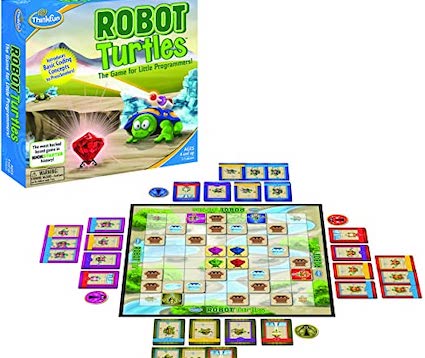
An issue was that most Early Learning products were too simplified. Examples like Project Torino, Code Jumpers, Cubetto By Primo Systems and Robot Turtles served as inspirations in terms of tactile and multisensory access. But you can only make basic programs as they are not Turing-complete.
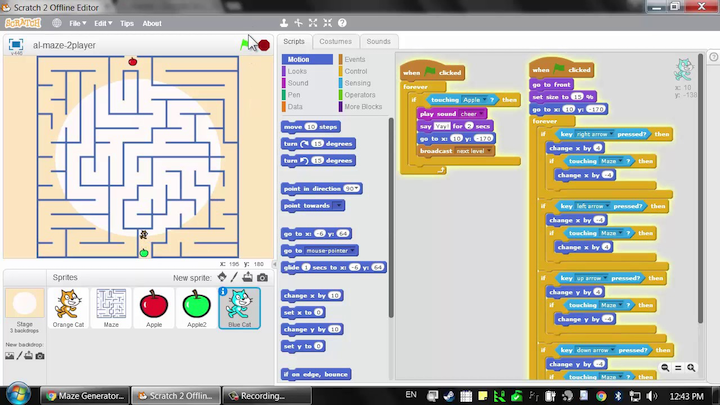
On the flip side, the issue was that more Advanced Languages relied on screens. Examples include: Arduino, Seymour Papert’s LOGO (Valiant turtle, etc), Turtle Academy and other learning environments, Scratch and other block programming languages.
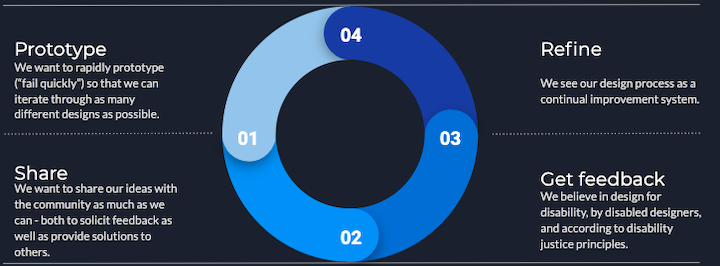
A “Fail-Quickly” Approach to Prototyping
In order to rapidly prototype a “fail quickly” approach was used so that the teams could iterate through as many different designs as possible. To this end, all models were to be made out of low cost material like cardboard, so that no attachment would be formed to the model allowing these models to be easily discarded in order to move to a different design.
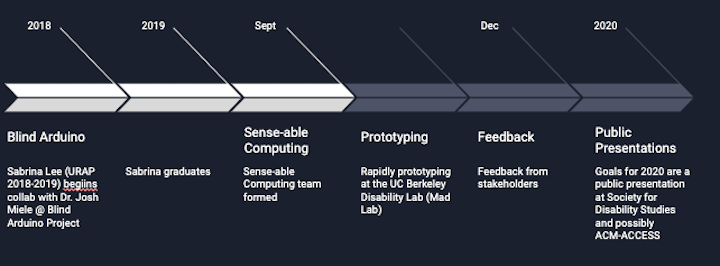
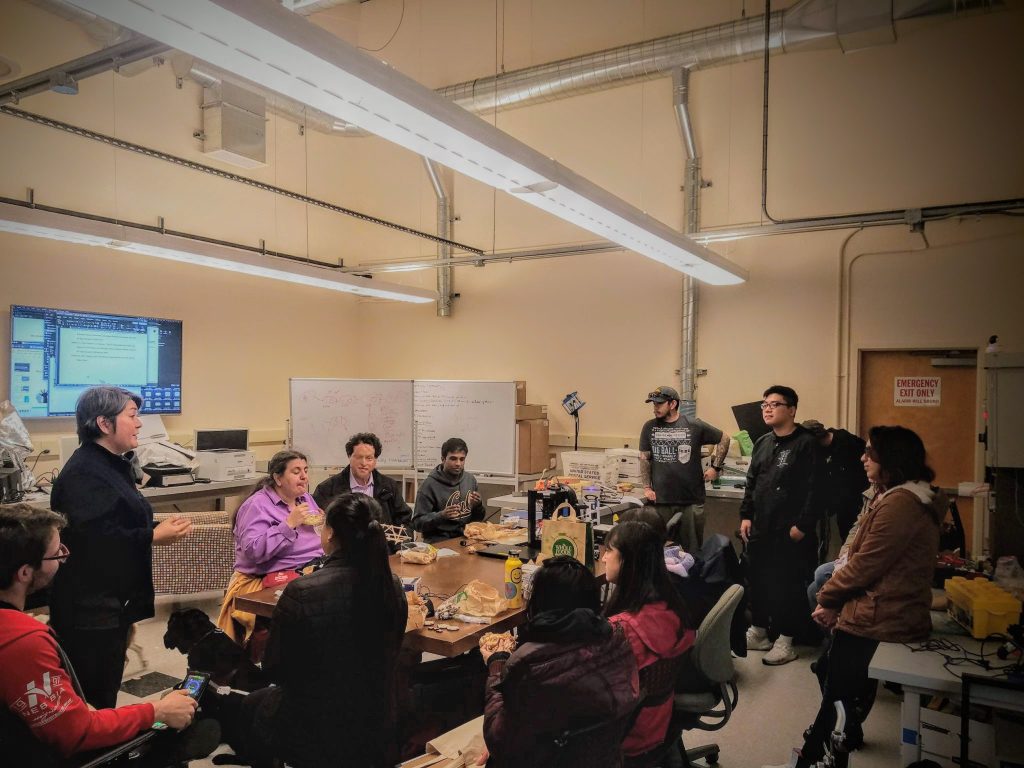
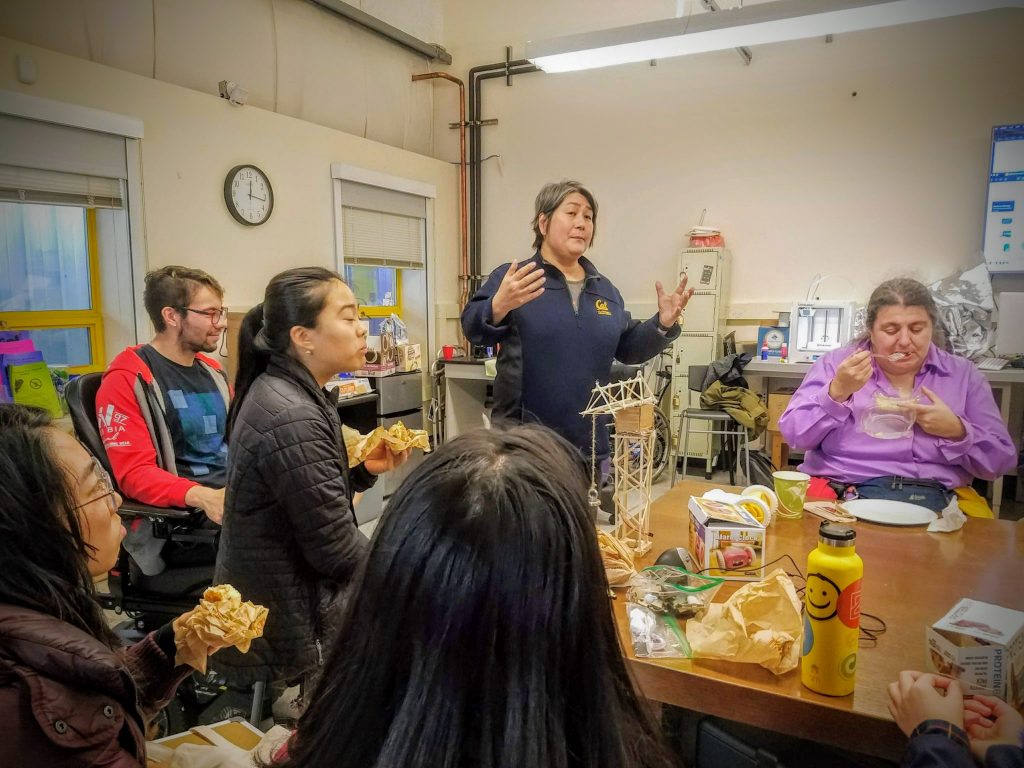
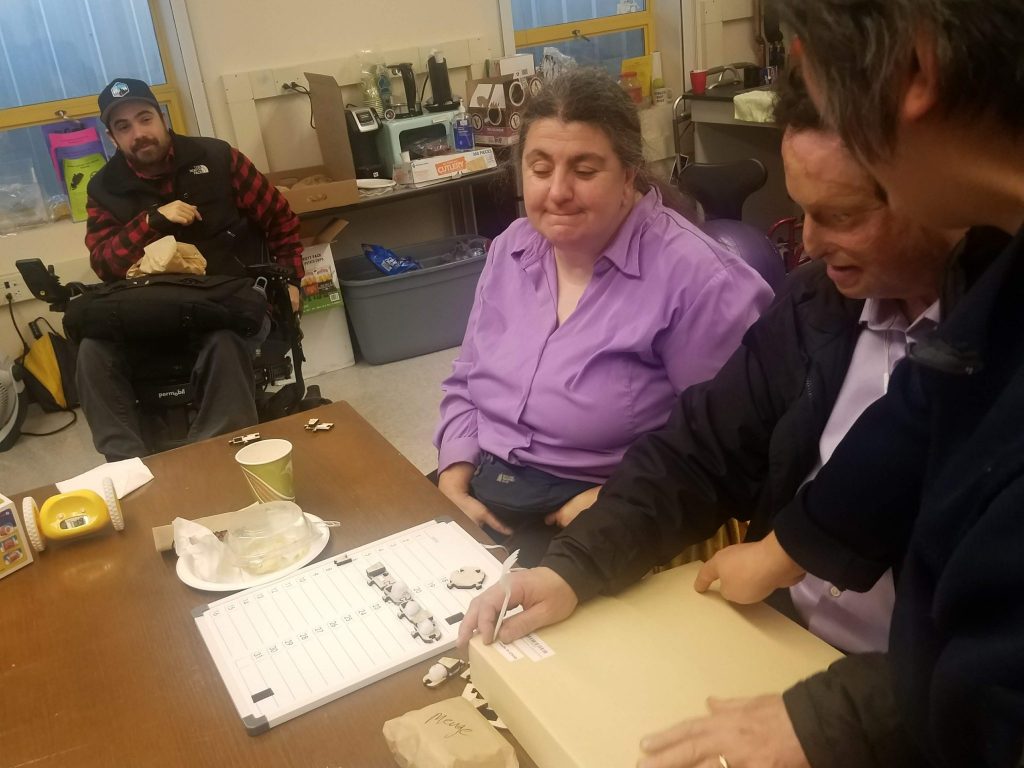
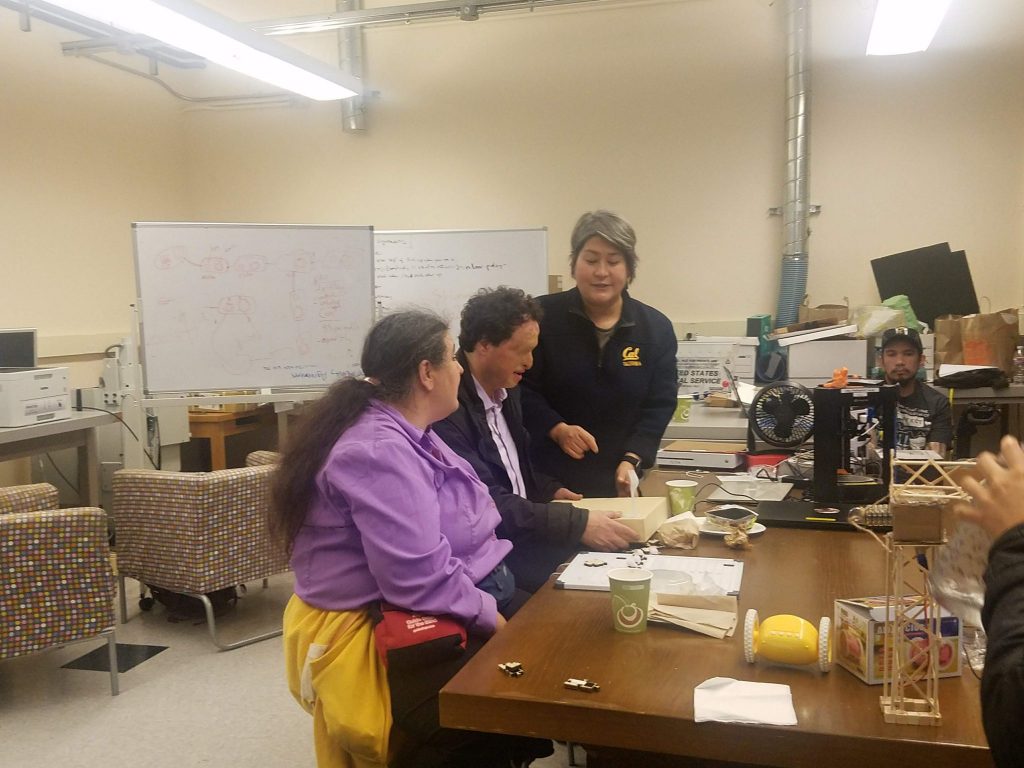
FEEDBACK FROM DR. JOSH MIELE, LUCY GRECO, DREW MCPHERSON
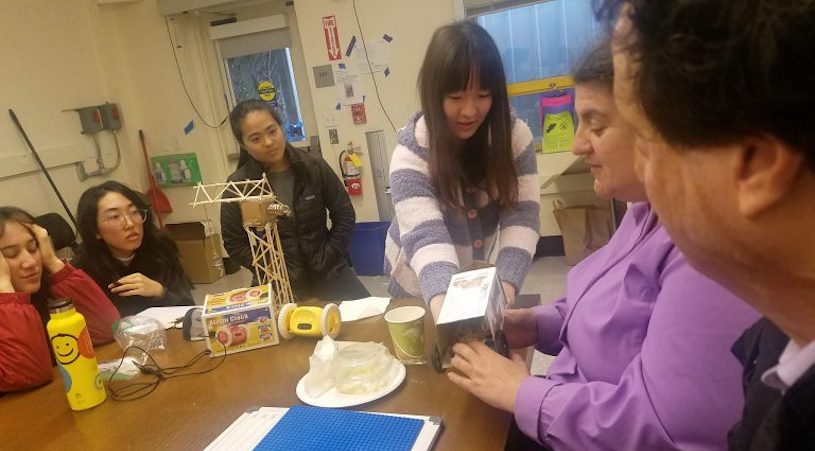
On December 5, the lab had three visitors to give feedback as the teams presented their progress till date.
Cal Alum, Dr Josh Miele, has made tremendous contribution towards blind accessibility, technology and education with inventions and is currently a principal accessibility researcher at Amazon. Lucy Greco is the Campus Web Accessibility specialist really leading the path for the UC system in all areas of accessibility and policy around accessibility. 2017 Cal Mech Engr graduate, Drew McPherson, is one of the founders of EnableTech and currently manages Ability Hacks, an organization that works towards solutions for unmet needs of people with disabilities.
TEAM 1 (2019-2020)
Sub-team “P^3” is the input arm of Sense-Able Computing and focused on prototyping a tactile input coding language to help the user learn the basics of coding. Essentially their goal was to create a working programming language (like Python, Java, HTML etc) that can be written, read and debugged through tactile and multi sensory paths.
The initial language designs were based on beginner coding languages such as turtle and Snap!. For the layman, Snap is a programming language that includes shapes which can move be forward/left/right etc. either via a screen turtle or robot.
Simply put, the input language had to be:
● Tactile / multisensory / tangible
● Easy written, read, debugged
● Pieces need to be easily and inexpensively producible (ideally by the consumer)
● Turing-complete — i.e., a “real” language
ITERATIONS AND CHALLENGES
The team has gone through ideas that include magnetic boards, separate blocks to represent different mechanisms, and most recently a lego-based block system that is less spatially restricted.
The team looked at the design as a board which would have moving parts in it. They had tried a no-board approach in between (only pieces) to have more freedom to build. But the team felt it would hard for the program to sense whatever the code was, so went back to board based approach.
Early notes on the project show planning out what a command would look like — ex., “draw a square”. Dials were also discussed as a way to mark numbers.
In order to rapidly prototype a “fail quickly” approach was used so that the teams could iterate through as many different designs as possible. To this end, all models were to be made out of low cost material like cardboard, so that no attachment would be formed to the model allowing these models to be easily discarded in order to move to a different design.
Initial Prototypes
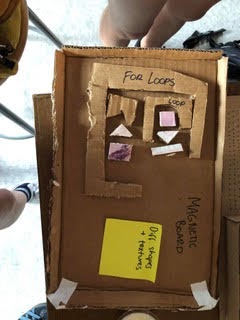
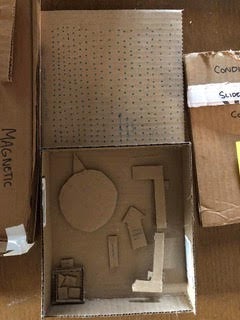
Olivia’s initial approach to how the overall structure of the prototype would work looked like the photo below. The main takeaways are that there would be pieces of different shapes and textures that would fall onto the magnetic board. Pieces would include instructions like “move”, number blocks, direction blocks, and for loops.
Mimi’s initial approach to the overall look of the board and code is in the photo below. In the box are direction blocks, number blocks, and a basic expandable for loop. The board would be like a snap-on grid, where the pieces snap onto the holes.
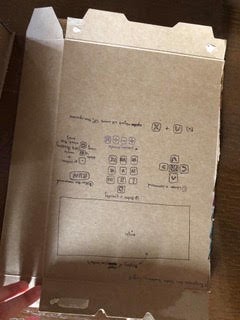
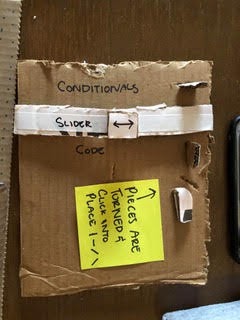
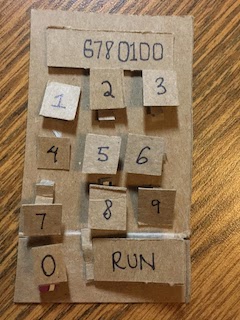
Kristie’s initial design idea for the layout of the programming language’s tactile interface includes a keypad for inputting quantities, arrows that point in the cardinal directions, a rotation button, and an empty rectangle in which an object would move.
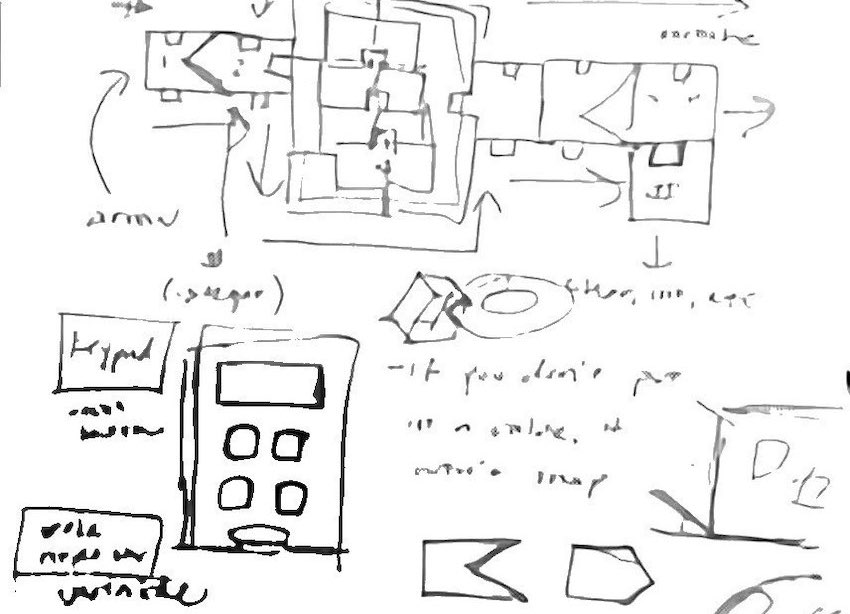
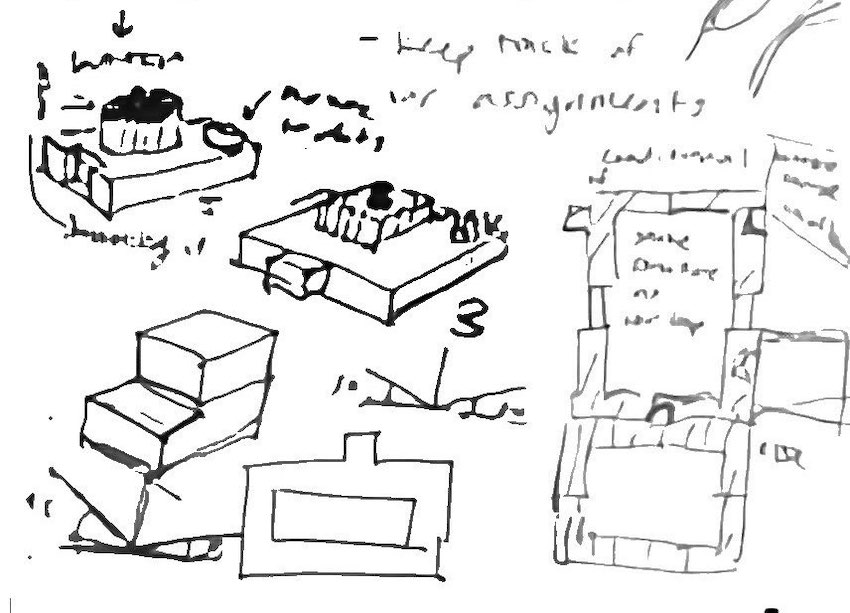
The images below show sketches and notes from the lab meeting on October 6th. During this meeting different shapes for the coding blocks were discussed and the team tried to decide how they’d fit together. At this time the team was still planning to use the keypad for inputting quantities and wanted to make a prototype for the following lab meeting. An alternative idea that had been proposed during this meeting was for students to adhere raised dots on the surface of their blocks as a method of inputting quantities.
Olivia’s second approach to the overall structure of the prototype went in a completely different direction and focused on how conditionals would work. It relied on kind of a binary design that wouldn’t be too flexible in creating code.
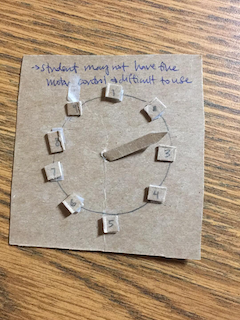
The team presented a spinner prototype at the October 23rd meeting. They had decided to try a spinner because with a keypad, it would be difficult for students to remember the different quantities they’d assigned to their variables.
ASSUMPTIONS ABOUT AUDIO, ALPHANUMERIC AND BRAILLE LITERACY
However, some concern arose at the Oct 31 meeting about the usability of spinner by people with more fine motor dexterity challenges. If a spinner is used for each variable, many tinier spinners would have to be used which makes it difficult to use. The team wondered if a bigger spinner was needed or whether the spinners should be numbered so that the block that is used for the spinner is the number of whatever you spun.
A potential solution to this problem was proposed: 3 different levels of rotational blocks that cater to different skill levels:
1. Beginner – 0°, 90°, 180°, 270°
2. Intermediate – 0°, 45°, 90°, 135°, 180°, 225°, 270°, 315°
3. Difficult – 0°, 30°, 60°, 90°, 120°, 150°, 180°, 210°, 240°, 270°, 300°, 330°
At the Nov 11 meeting, the group discussed board limitations, code orientation and how the pieces should come together. Specifically:
● Code Orientation: Should the loops be vertical or horizontal?
● How pieces should come together: snap like puzzle pieces or lego blocks?
● Building out more robust version of code pieces (3D)
● Board limitations: too small/narrow, constricting in code flow; however, it’s difficult to implement a camera without the use of a board and enclosed space for the user to work
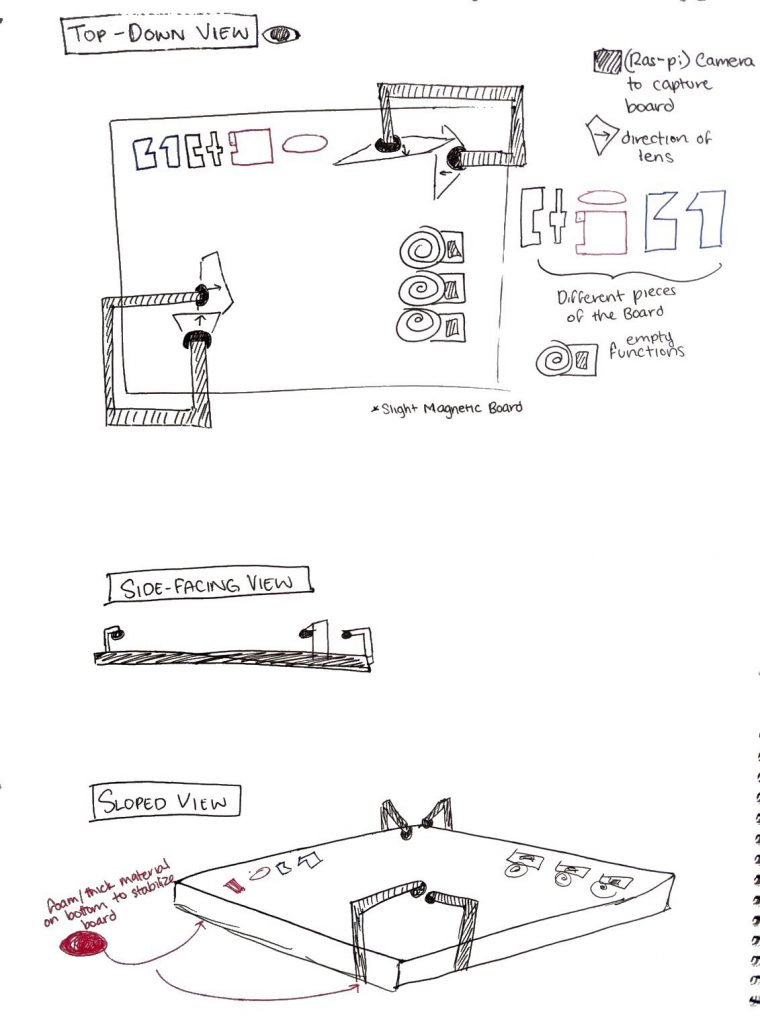
Magnetic Version (current)
The pros to this version is that it inexpensive, pieces are tactile, the different levels cater to different skill variations and the magnetic board keeps the code controlled. The cons are the limitations of flow on the board and not “drop-proof”. It also assumes a degree of alphanumeric literacy (knowledge of numbers and angles).
Lego Version
The Lego version shares the pros in that it caters to the different skills variations and keeps the code controlled. It shares all the cons of the magnetic version. In addition legos are more expensive, less tactile (smooth on all sides) and harder to detach.
Compiling the code
Inspired by a comment by Dr. Josh Miele at a lunch two years ago, Prof Karen Nakamura had the idea of a camera on a stalk (represented by a fork) that would read the boards prepared with the input code. The “magic board” as it has been nicknamed by the team would have the smarts of the system — a CPU that would run the camera, read and decode each “page,” compile the program and execute it. This would all be done magically by the board, thus its nickname. It’s also magic because the team has yet to spec the board, but it is envisioned that it’ll be a small one-board CPU with an attached camera (such as a Raspberry Pi 4 + with its HD cam) and running something like OpenCV (an open source computer vision stack) and running a small real-time interpreter for the command language. The goal is for the magic board to cost less than $100.
Future goals for spring
Future goals including flushing out more pieces to be able to create more complex code. Create distinct levels of difficulty:
● Level 1 (early learner): move, rotate, fixed numbers 1-5, fixed rotation 30-45-60
—–○ Goal: Move a robot to make a square or a triangle
● Level 2 (intermediate learner): for loop, numbers 1-10, variable (clicky) rotation, more types of output (sound, buzzer)
—–○ Goal: Play a song, make the robot do a complex shape
● Level 3 (advanced learner): if conditional/comparators, input variables (sensors), more types of output (speech)
—–○ Goal: Move a robot through a maze
Onboarding documents and tutorials would be created – How each user will learn each piece and possibly create lesson plans to onboard concepts. And some fun projects that can be created!
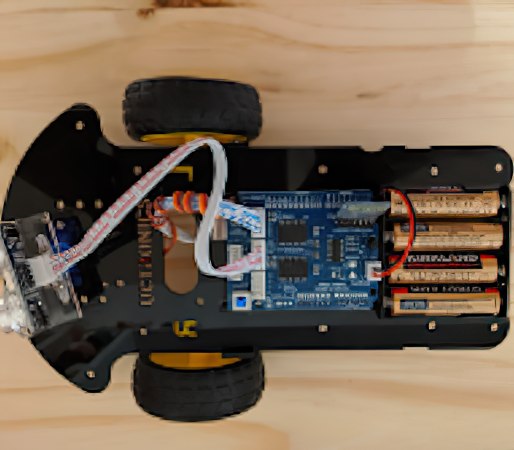
Team Apple Pi is the output arm of “Sense-Able Computing” and trying to make a programmable robot prototype a reality.
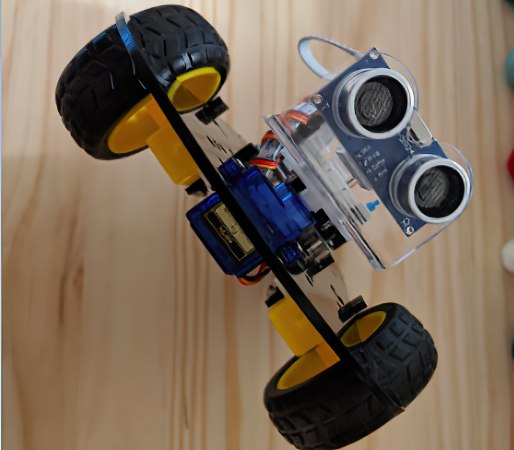
In the weeks leading up to building a prototype, the team worked on familiarizing themselves with Arduinos, and servo wheels. An Arduino can be thought of as analogous to a circuit board that powers other stuff like servo wheels. So you program (write lines of code) to make the Arduino do more precise movements (like move left, right, forward). The servo wheels themselves are connected to a breadboard.
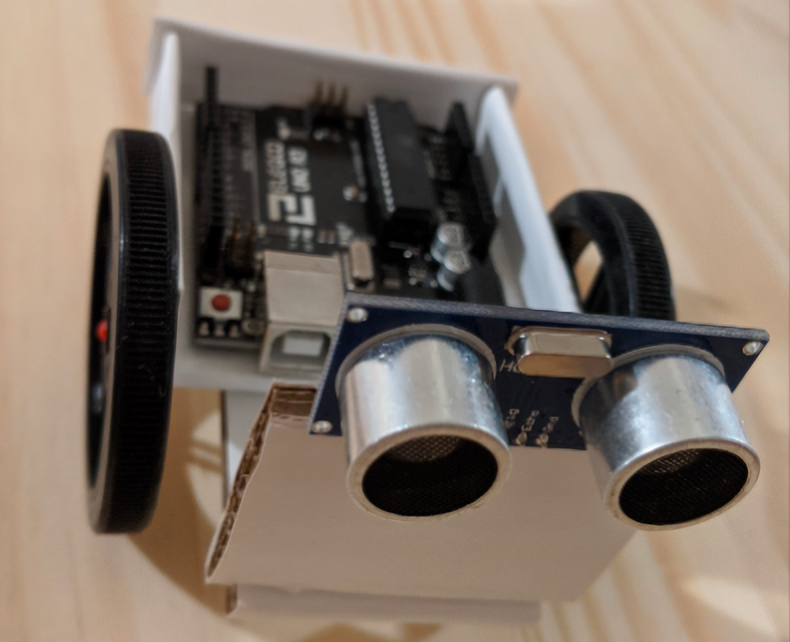
Per Prof Karen Nakamura’s instructions, each prototype had to be able to move in some way and to also have to have a sensor (either a cat whisker, ultrasonic sensor, or optical sensor etc.) which would work with the programming language of the input team. An example is “if robot bumps into something it sends feedback to the Arduino and the a different branch of the code needs to be run to accommodate the obstacle. Or “if the robot detects its head is being tapped, it reacts by purring happily.”
The group came from mixed majors which included engineering, biology, and anthropology, so these concepts were new to at least half the team members. Team leader Gloria Kunder feels that having mixed majors meant that their skills were complemented. Non-engineering students were able to think of possibilities without being limited by the knowledge of immediate electronic limitations, and so able to expand on knowledge brought by engineering students.
Thus an initial task was to learn to program about continuous rotation servo wheels. They also needed to familiarize themselves with Arduino and make the LED switch on it to blink. The end goal was to use Arduino servo motors to control the wheels of the robots.
Initial Prototoypes
The team set to work to cranking out more prototypes: different sizes, stationary and mobile- keeping in mind the places that students will learn i.e. kitchen table, school desk, living room floor, etc.
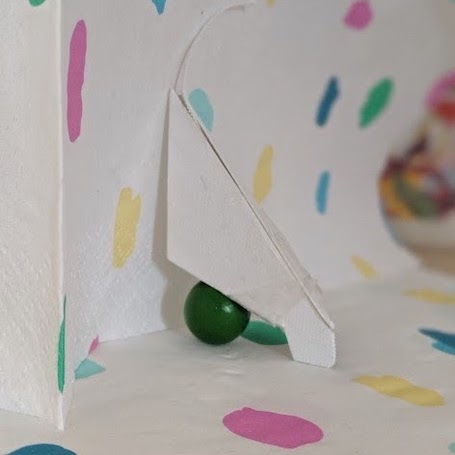
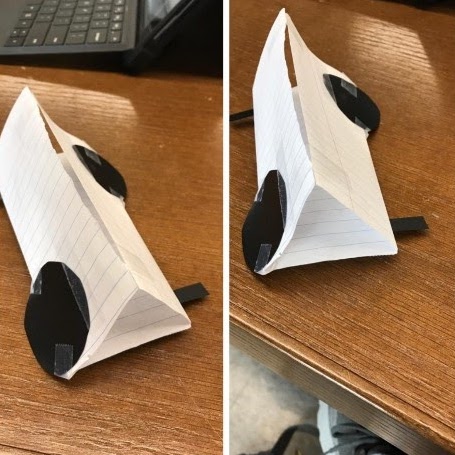
Gloria created a triangular (pyramid) shaped robot. The idea was that it will be tall enough to accommodate the Arduino, but narrow on the bottom and thus able to navigate a small desk more easily than the previous prototype. It uses two servo wheels in the front, and a rolling wheel in the back that will balance the robot and assist in travel. The robot features two-wheel drive, basically. The cat whisker is in the front and is positioned downward. The prototype has a polka dot background.
Karen-the-student’s (to distinguish from Prof Karen Nakamura) idea was to create a long triangular prototype which features wheels on opposite sides.
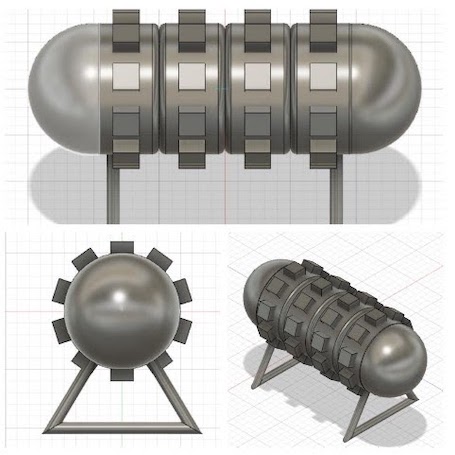
Ewan’s idea was for a codex. The wheels would still operate to spin the codex and spell out words. His prototype is stationary. He created his prototype using a 3D modeling system.
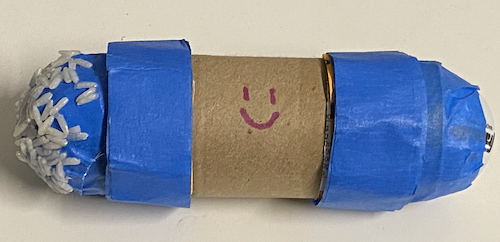
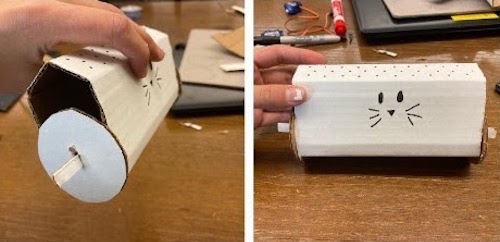
Irlanda had an initial idea of a cylindrical robot that used two independently powered wheels to move- this would give the robot the range of motion that the input team was working on. Then, she wanted to create a ball-shaped robot, but couldn’t quite figure it out, so she chose a similar concept to her last robot, but with more sides. Hers has a cat face.
Challenges
A period of no progress followed as the team thought that they were responsible for both input and output, and were working with wild ideas. Gloria, for instance, had wanted create a pirate wheel that was controlled by Arduino, and then an alien on a radio-controlled skateboard. However, at the following meeting, the team was back on track as Prof Nakamura clarified the scope of the team’s work.
There was a definite learning curve in the first few weeks. The group had to determine what would constitute a sturdy and sensible design. Designs for different environments; school desks, kitchen table, floor… had to be imagined.
Another challenge was the difficulty in creating a prototype that could accommodate an Arduino (‘brain unit”), and the various features that the robots would need in order to be accessible, in a small environment.
The group came to the realization that the prototypes would have to evolve as learners evolved and thus divided the creations into three different families: robots for elementary learners (family 1), middle school learners (family 2) and high schoolers (family 3).
The next step was to consider a prototype that could be produced for under $50.
In order to rapidly prototype a “fail quickly” approach was used so that the teams could iterate through as many different designs as possible. To this end, all models were to be made out of low cost material like cardboard, so that no attachment would be formed to the model allowing these models to be easily discarded in order to move to a different design.
MOVING TO THE NEXT PHASE
As the group entered the final phase of the URAP, two team members tried building robots from a kit to see how a functional prototype works and then combining them with their ideas- or really, to “borrow” some of the technology/pieces from the robot kits. They had the idea of creating three families of robots:
Family 1 (basic): Simple wheeled vehicles that can respond to commands such as: forward, back, left, right and have simple sensors that can detect if the robot has hit (or is about to hit) an object, or that the robot has detected or not detected a line.
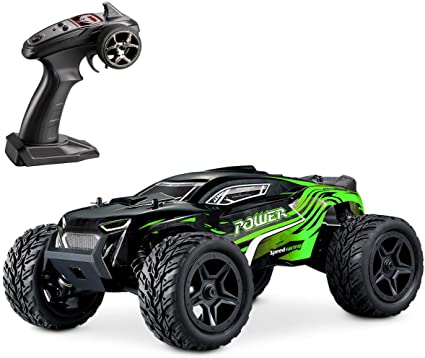
→ Inspirations: robot turtles, RC cars, robot sumo

Family 2 (intermediate): User-responsive robots that would have multiple touch sensors, haptic feedback, and voice recognition/output.
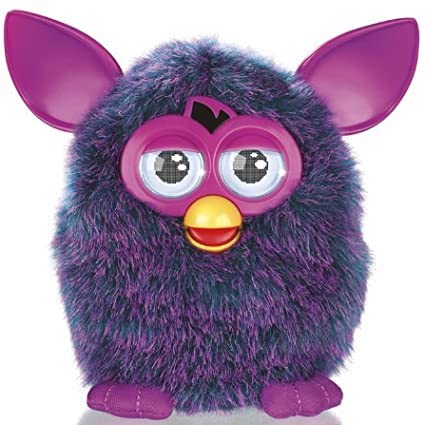
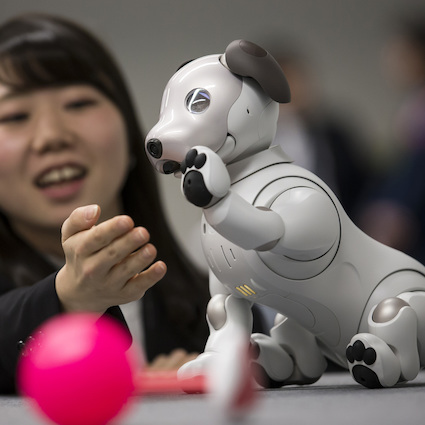
→ Inspirations: Furby, Aibo, Paro

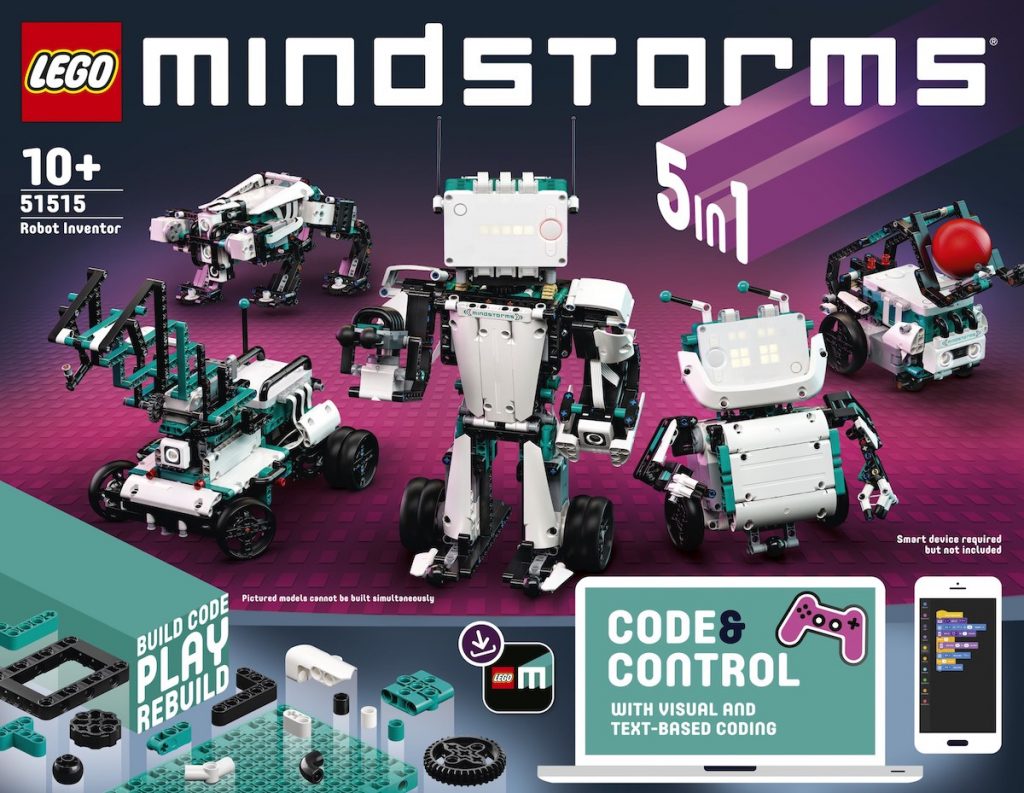
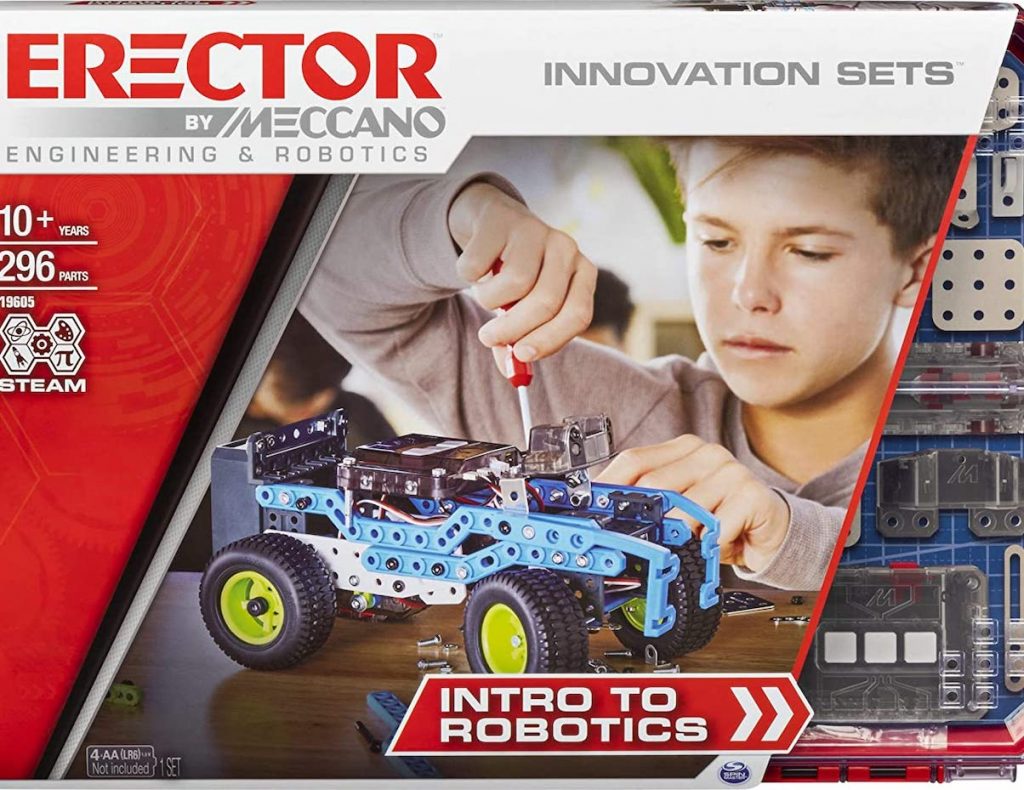
Family 3 (advanced): Construction-set parts such as meccano/lego mindstorms and would include robots such as cranes, plotters, and robot arms. They would be able to be programmed in XYZ space, have multiple actuators, and more sophisticated sensors.
→ Inspirations: Lego Mindstorms, Meccano
Arduino prototypes
Gloria, Karen-the-student, and Irlanda came up with Family 1 (basic user) prototypes.
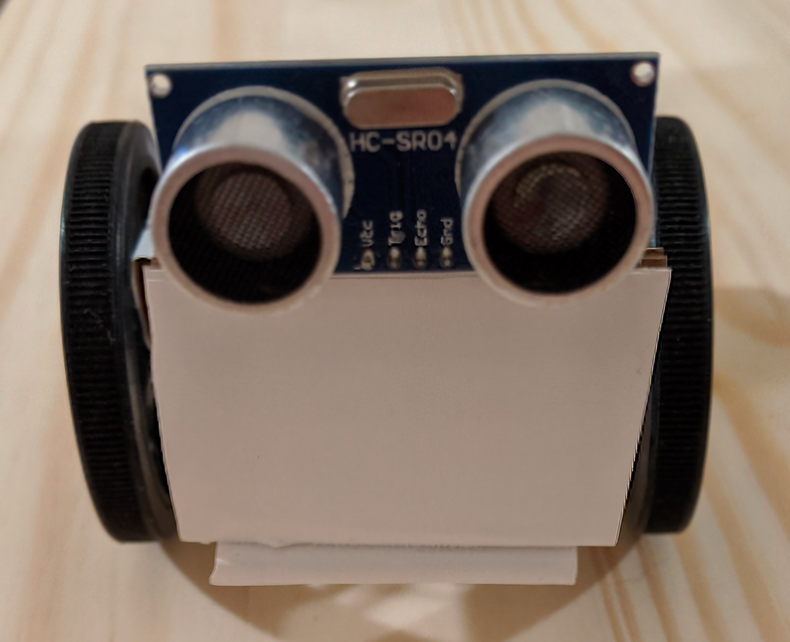
Gloria’s prototype is based on a previous model from November 13th. She found that an ultrasonic sensor was preferable to a cat whisker switch because it could provide audible output for the user. In addition, her thinking was that an ultrasonic sensor would be more compatible with a smaller work environment.
The robot was built from a kit, and she was able to test run the features of the ultrasonic sensor as well as the battery pack.
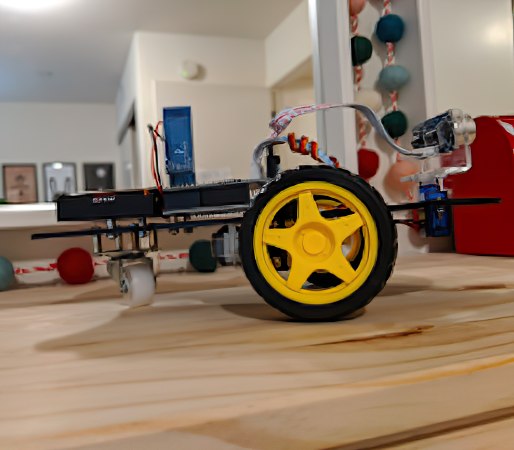
Issues of power flow in past iterations were addressed- the battery pack proved to be a simple solution. The ultrasonic sensor also responded quickly to obstacles and automatically reoriented the robot. With these features in mind, she created a simpler and smaller prototype based on past iterations and outside inspiration.
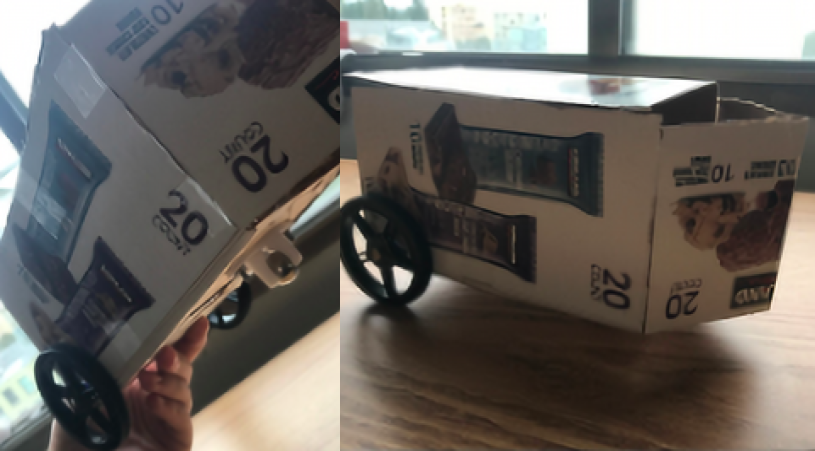
Karen-the-student’s prototype is a re-modeling of her 2 previous prototypes: a triangular shaped car and one with slanted wheels, in addition to a mini car kit. She utilized a rolling wheel at the front to support the two wheels in the back, which are controlled by servos. The front of the model is pointed, so that touch alone would allow for the user to orient the model properly.
A pro of this prototype is that it is relatively simple to build; the front is simply two surfaces coincident in the middle to create a tip, and the rest is a box that encompasses the breadboard and the Arduino inside. A con of this prototype is that the car is relatively big, and would require a larger surface on which the robot would move around on. However, simple maneuvers are possible on a smaller surface.

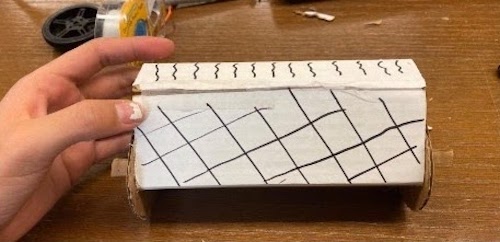
Irlanda’s family 1 prototype was inspired by the Sphero product “Ollie”. Although both share a cylindrical shape, this prototype is adapted to allow spatial orientation through tactile add-ons. The body of this prototype is cylindrical with a wheel on either side for mobility. She added two “eyes to the body, in order to distinguish the forward facing part of the body. In addition, each wheel contains its unique outer shell, in order to orient and visualize prototype positions. Pros is that it is easy to build and makes spatial orientation and visualizing easier. The cons is that it can be big and bulky to accommodate for Arduino.
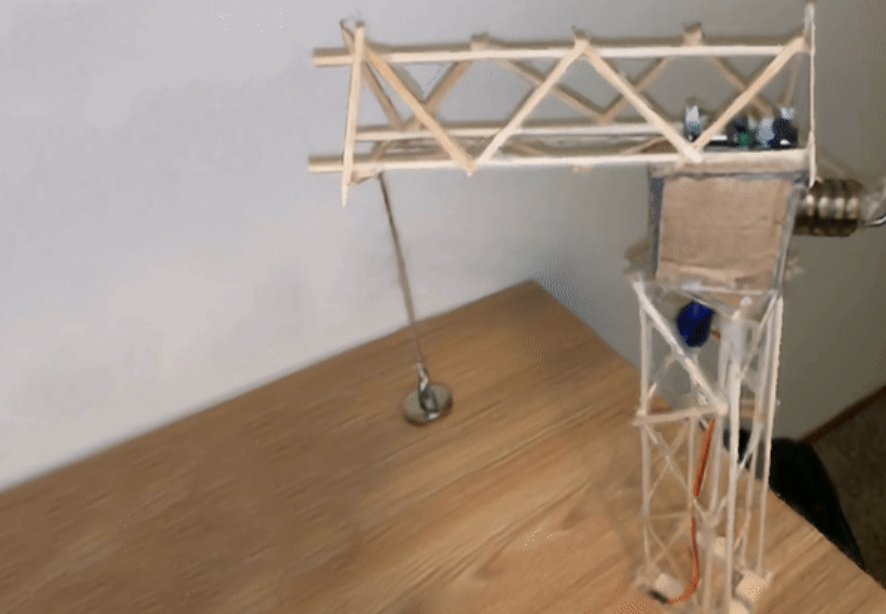
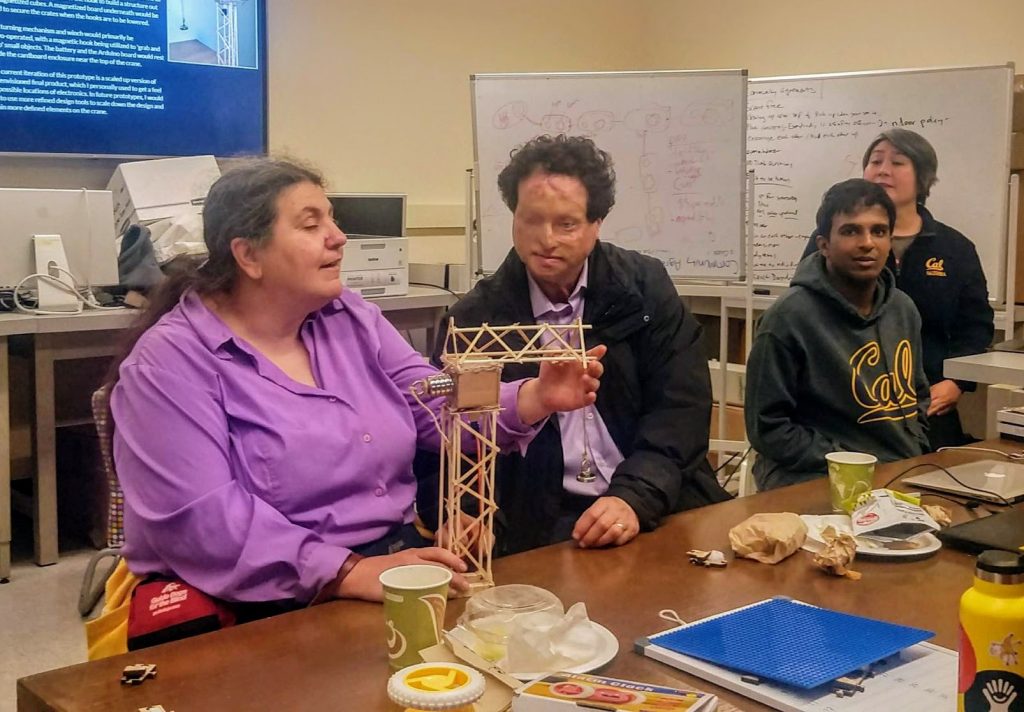
Ewan’s family 3 prototype is based on a new concept emulating a crane game. In this game, a user would feed directions into the crane to turn the crane and lift or lower the hook to build a structure out of magnetized cubes. A magnetized board underneath would be used to secure the crates when the hooks are to be lowered.
The turning mechanism and winch would primarily be servo-operated, with a magnetic hook being utilized to ‘grab and drop’ small objects. The battery and the Arduino board would rest inside the cardboard enclosure near the top of the crane.
The current iteration of this prototype is a scaled up version of the envisioned final product, which Ewan personally used to get a feel for possible locations of electronics. In future prototypes, he would like to use more refined design tools to scale down the design and retain more defined elements on the crane.
This semester the team concentrated on building prototypes that were mobile, and ideally small.
In the future they would also like to focus on some of the Family 2-type stationary robots that could provide audible visual, and tactile responses and a different type of programming challenge.
UPDATES – MAY 2020
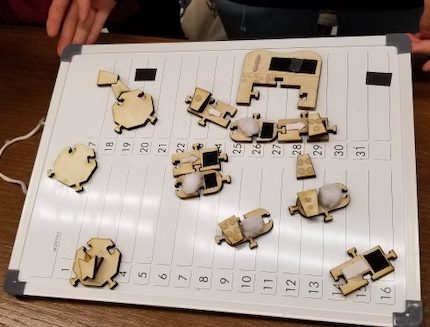
The Sense-Able computing team was able to produce two different iterations of design and construction for the puzzle set itself. Karen Nakamura (the student) was also able to build two different types of boards which would provide the base on which the pieces would be set.
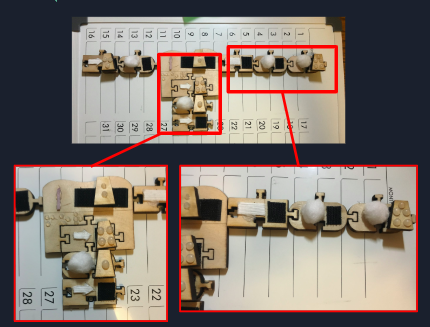
Kitty Gu drafted a language structure for the puzzle set that would be both intuitive, and fun for young learners to interact with. She went on to explain that the language structure is meant to imitate the construction set of a puzzle set with the reading style of English writing. The physical pieces would be read left to right starting from the top. The idea is that this would provide an organic transition for the young learners.
A level one programming environment would begin with simple directional commands that would control a small robot. The pieces have arrows imprinted on them to distinguish up, down, left and right. If the young learner wanted to implement the same command multiple times, then they could use an iteration wheel piece attached with a numerical piece that would indicate how many more times the command would be done. The iteration wheel is in the form of a circular arrow that would tell the user the command would be implemented again, and the numerical piece itself has multiple circles imprinted on it to indicate how many times it would iterate through the command (think of the circles on the side of a dice). These exercises would teach learners the basic logic within programming, a skill they can take into higher levels of learning.
Currently the team is working on a level 2 and 3 set of puzzle pieces that would make use of letters, and python commands, so that our audience can take their programming experience to the next level. However, this is currently in the development stages and needs further revision. Eventually the team hopes users will feel empowered to make use of the language to create anything they desire. The team points out this empowerment tool they hope to achieve, all started here in the disability lab.
Irlanda Gonzalez had also reached out to Lighthouse for constructive feedback that would be critical for the direction of the project. They got a lot of positive feedback for the project and prototype. They also got some great feedback on what direction to go and how to execute it.
Lighthouse expanded on the fact that the young learner may eventually feel overwhelmed with larger puzzle sets for more extensive sets of code. They recommended that the learner may be able to save a program onto their own unique singular puzzle piece in order to save board space. It is an idea that the team will implement in the future.
Lastly Ewan provided the research for electrical components that the team would need in order to facilitate the camera that would act as a scanner.
Christian points out that the shutdown limited access to fundamental tools such as 3D printers and lab equipment which has impeded the team’s progress on developing a physical prototype. The team is currently working around these challenges and hopes to make a few more strides before the formal end of the semester.
What the team has managed to do is consolidate all designs, files, research articles into a single google drive file and made preparations for continuing the project in the Fall semester of 2020. Christian continues to build additional puzzle sets through use of his personal 3D printer. Karen (the student) continues to further designs on 3D software, while Kitty continues to make modifications to the language structure.
Ewan and Irlanda are graduating this semester after a year at the Rad Mad Disability Lab. We wish them the best in their post Cal lives. The remainder of the group hopes to have a fully developed plan for next fall in order to complete a successful prototype later this year
TEAM 2 (2021-Current)
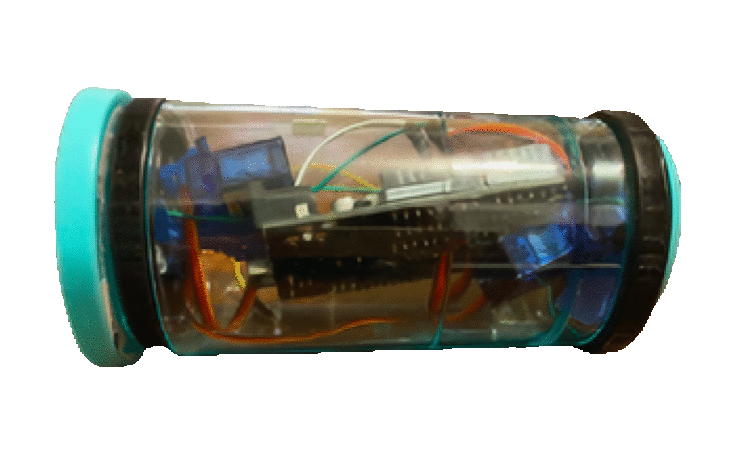
Starting in fall 2021, a new team succeeded the Sensible Computing project: Sohom, Amaan, Taliyah, and Abigail, led by Anthony. They first spent several weeks coming up with a new idea that would be the most tactile, fun, and affordable way to teach programming from an introductory level. Initial ideas ranged from using assorted pasta pieces to high-tech smart modules for the coding blocks, with the output being a table robot or a board game.
Finally, the team settled on designing a programmable drum musical toy. Users will be able to purchase a kit of coding blocks to be paired with an electronic drum, or just the coding blocks and use a free phone app for output. The input is a collection of plastic blocks arrange-able on a puzzle-piece shape tray. The trays are modular so that the work area for coding can be customizable and expandable. The blocks have tactile designs to allow users to identify the blocks and be compiled by computer vision. And the drum toy allows a hands-on play experience with melodies enjoyable for the blind and visually-impaired.
Taliyah and Amaan worked on the user interface with the code blocks. They came up with all the different blocks needed and ways to demonstrate variables, if/else statements, loops, and more. A challenge was figuring out how to make it easy for the user to choose a specific music note.
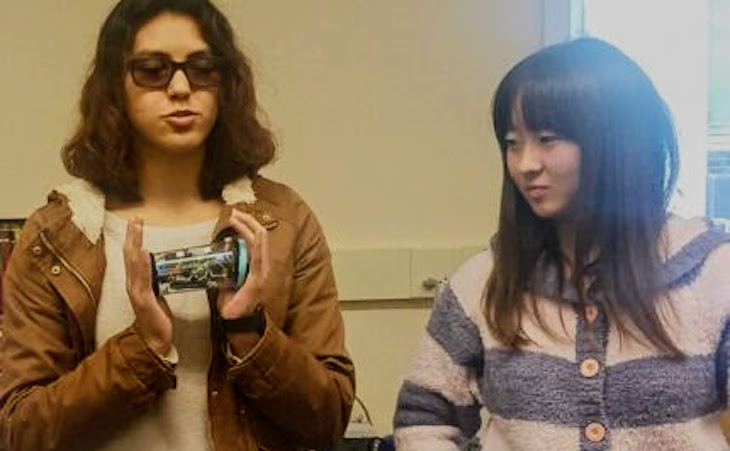
Sohom worked on writing the software for identifying components with the computer vision. At first, the plan was to use color to identify the different blocks, but when the team realized there would be almost 30 different colors, they needed to come up with a new identification system. Currently, they are thinking of using both color and pattern recognition, as well as ArUco markers for the edges of the workspace.
Anthony worked on creating a prototype for the drum. He thought of using an accelerometer to detect the drum being hit, and put together an Arduino-powered circuit to test the idea. Taliyah wondered if a piezo vibration sensor would perform, so she fabricated a cardboard drum and found that the cheaper alternative could work too.
Note: Comments are held for review before publicly posted.
